Building a Virginal: Easing the Keys
March 13, 2023
New York, N.Y.
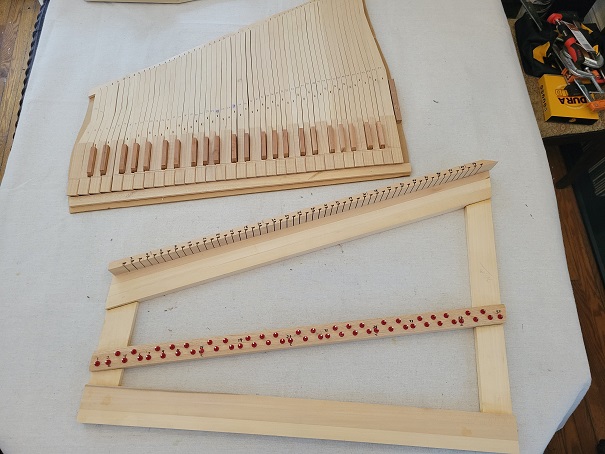
I spent much of Saturday performing a job that the Zuckermann Troubadour Virginal Construction Manual calls “easing.” The 55 keys (on the top in this photo) must be transferred to the keyboard frame (on the bottom) that I assembled earlier this month:
Easing involves massaging each key so that they can freely rock up and down like a seesaw but without bumping into their neighbors.
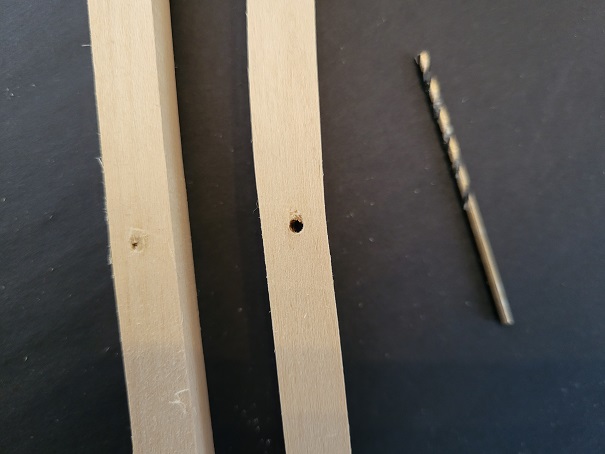
The pins in the balance rail in the center of the keyboard frame are 3/32-inch in diameter. Each key has a balance hole that is supposed to be the same diameter, but the holes aren’t quite cleared out sufficiently, as you can see with the key on the left in this photo:
The one on the right is nearly ready. I used a 3/32-inch drill bit to clear out the holes. I was planning to just gently twirl the drill bit around in my fingers, but that didn’t quite work, and I gave up and sought help from a Dremel. But it’s important to avoid making the hole too big because then the key will wobble.
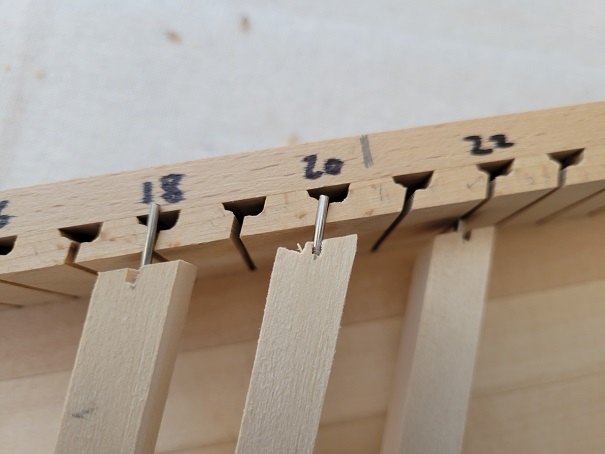
To prevent the keys from moving side to side, each key has a guide pin inserted in the back end that moves vertically in the rack at the top of the keyboard frame. I discovered that these guide pins were often sticking out too far and some were a little crooked, as the key I labeled 18 in this photo demonstrates:
The first problem is easy to solve: Just hammer the guide pin into the key a little further and straighten it out with pliers. But then the guide pin doesn’t slide freely in the slot, so the sides of the pin have to be filed. The Construction Manual recommends (page 35) that the pins be filed to an ovoid shape to minimize contact with the slot. I didn’t quite manage that feat, but I’ll probably work on these pins further if I discover that the pins aren’t moving well or if they make some noise.
I thought this easing job might seem overly laborious if I started from the bass end of the keyboard and moved steadily upward (or the other way around), so I went in the order of the circle of 5ths. First I did all the F keys and then all the C keys, and so forth. What’s fun is that you can test out the keyboard by actually “playing” on it. Here’s a little video with the F and C keys installed:
Some are still a little hesitant and required additional work. Notice the high F, which is tilted the wrong way. These keys are not yet balanced, which involves drilling holes in the keys and inserting chunks of lead. Eventually, as a key is depressed, the end of the key pushes up a wooden mechanism called a jack, which also has some weight, and the jack plucks a string, which also involves some resistence to the key press.
Which is to say that no matter how hard I tried to play the keyboard as if I was performing an actual Bach or Mozart composition, I failed. The feel was just too off.
Here’s the keyboard with the G and D keys also installed:
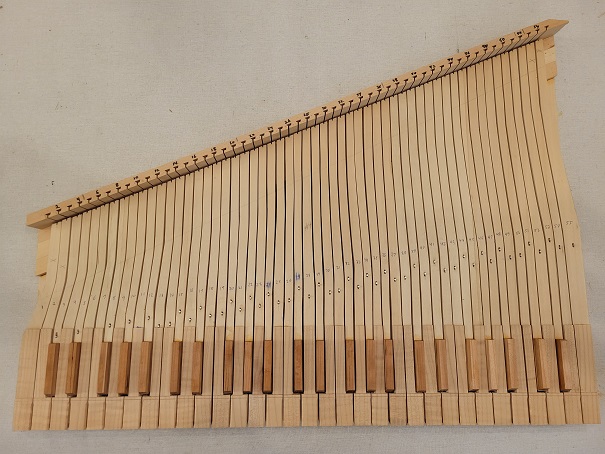
Eventually with the easing of all the A♯ keys, the keyboard frame held all the keys:
This is not permanent. The keys will frequently come out and go back into the frame as various jobs need to be done. Eventually there will be felt strips on the front rail below the keys to cushion the front of the keys, and on the back rail to cushion the backs of the keys, and that will eliminate the clickety-clackety sound. But for now, I’m going to hold off as long as feasible on installing those felt cushions. This clicking is the only sound my virginal makes just now, so I’m going to relish it.
The following day (yesterday), I started work on the case into which the keyboard frame will be inserted, and which will hold the sound board through which the jacks are suspended and across which the wires are strung. But because construction is taking place at our little house in the Catskills and another snowstorm was expected, we decided to get back to the city before being snowed in. There was no way I was going to miss Lohengrin tomorrow evening!
Construction resumes on Sunday, March 26. Follow my Twitter feed The Plucky Virginalist for the blow by blow.


